This post is somewhat later than I had intended, but tis the season to be poorly. I've been full to the ears with snot, as has the wife and more importantly so has the little one, who has just been quite upset with it all. I am hoping that by getting an update in place that perhaps it will act as some sort of catalyst to feeling better soon!
So, Salute in London is on the way mid April, and I want to try and get a couple of new models painted in time for the show. I'm not going to put myself under too much pressure to work super hard and cram a load of entries in, largely because I can't hack the late night sessions these days. But, with the bonus of the airbrush now, I am sure that I can get at least one decent new entry done. Likelihood is that I will recycle a model or two for other entries too though... We'll see. ;)

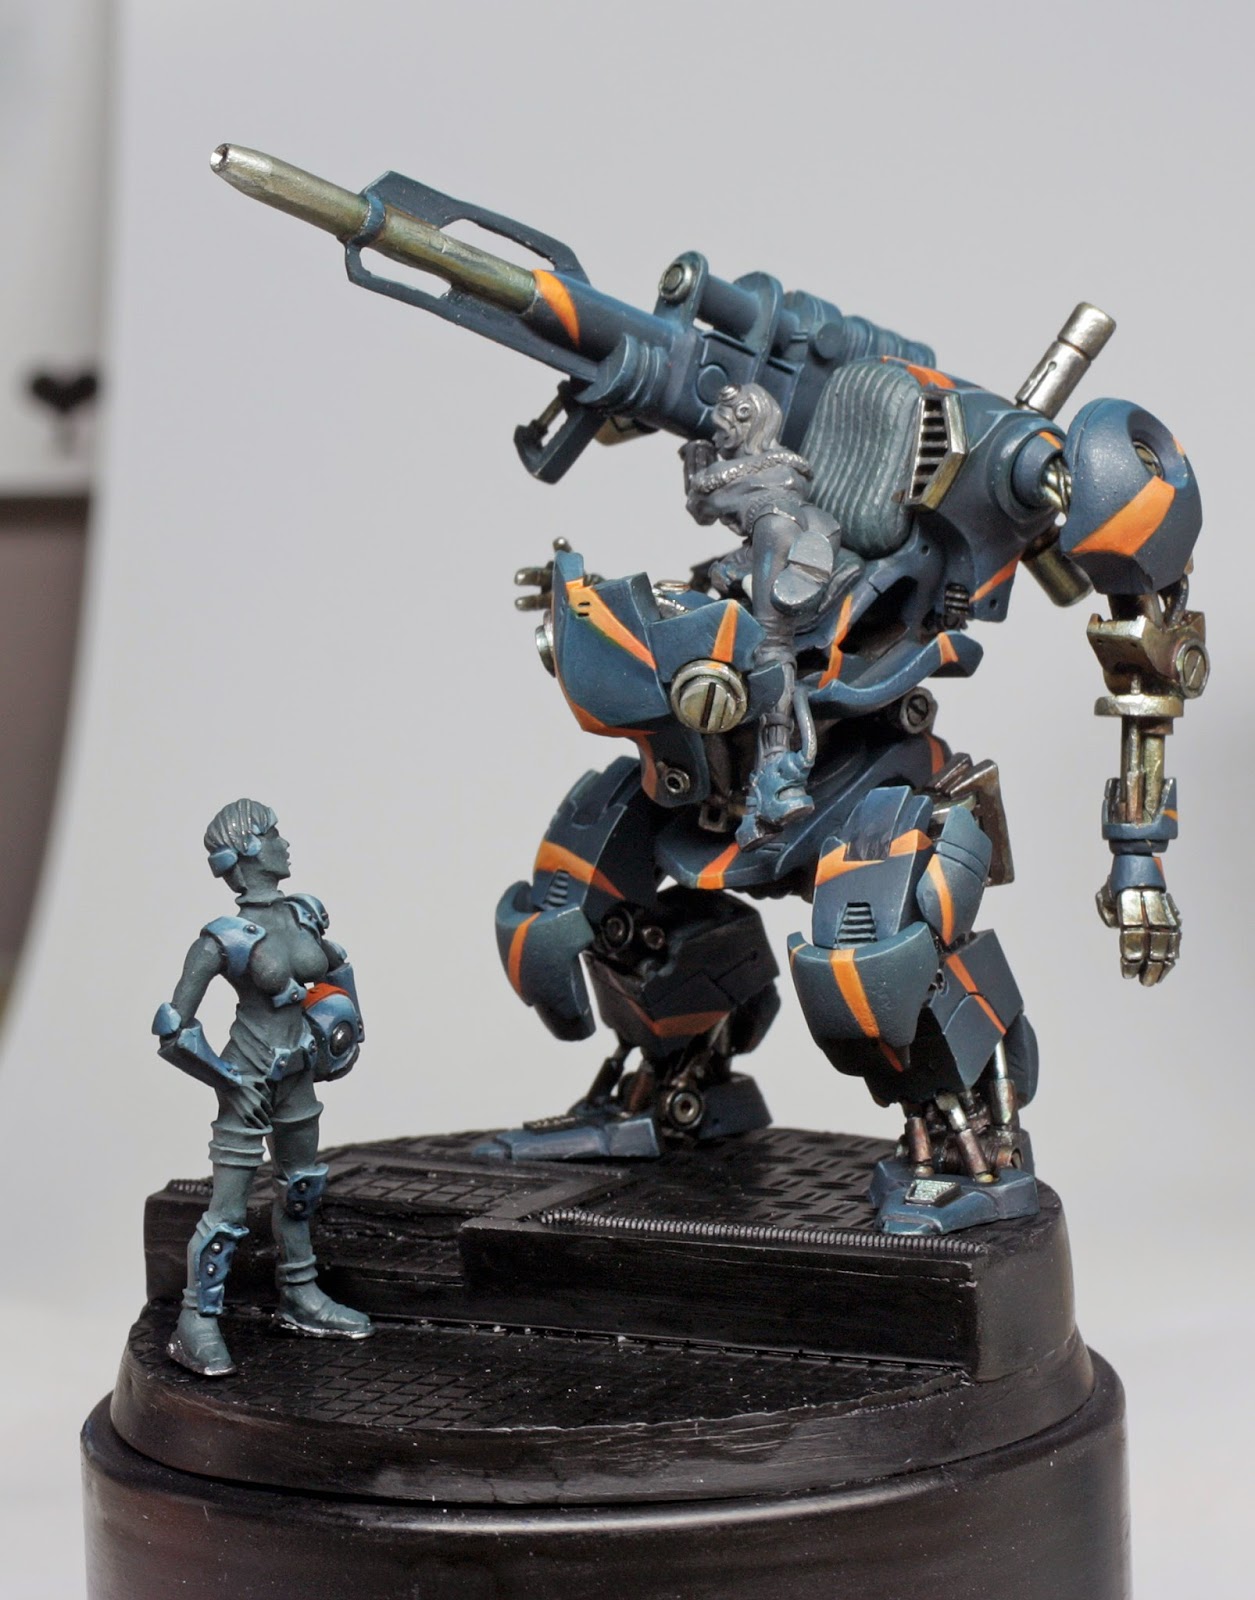
Anyway. A while back I received a Soda Pop kit called "One Shot & Fritz", which is a kind of mecha-type walker and pilot girl (plus chibi mascot, but that's going nowhere near this piece!). From as soon as I saw it, I felt that the pose of the pilot looked more like she was repairing it or preparing it to go out, and was not necessarily the pilot herself too. So, I thought that putting the piece in a service area setting would be ideal. I also thought that her pose was such that she wasn't actually doing anything at the time, and more that she was in communication with someone else - maybe the pilot...
With that idea germinating in my head, I had a look through the grey pile and found what I think is the ideal model to complete the scene, which is Cyril Abiati's classic "Female Mech Pilot" which I picked up in a CMON store order a couple of years back. Her pose - with a tiny tweak of her neck position - is spot on, and her outfit and size are perfect for the scene. Better still, I found a resin base that a friend had sent me a while back when he was selling them (sadly no longer doing so). It fitted the scene perfectly and the mecha stands on it in just the right spot too. It's not often that these things come together so well, but sometimes it
does pay to have hoarded this mini or that part with a view to a future diorama/vignette...!
Once I had cut down a conveniently sized instant coffee jar lid (more hoarding!! lol) to serve as the plinth for the base, I set about cleaning, sanding, pinning and rough assembly of the piece

I do feel that there needs to be
something in the front right of the scene, but I'm not too concerned quite what at the moment. It could be an oil can, or some hosing, maybe a toolbox, spare part, whatever...
Layout figured out I got on with some priming and partial assembly of the mecha itself. The actual assembly was mostly guesswork, as there aren't any instructions, but there are a lot of parts! The resin of the cockpit/engine part didn't go together all that great either, but a bit of huffing and puffing and plenty of superglue and sanding got it in reasonable shape. :)
Colour scheme in mind is a very dark blue black over all, with orange markings to contrast. I'm kind of torn as to whether to weather the whole thing too much. I'm thinking not, but there is some damage on the resin that looks OK as damage, rather than spending endless hours making each piece super smooth, which I might have done with a less fiddly, and better fitting kit.
Armed with airbrush I laid in some basic grey to blue/black transitions, some basic metallics here and there, and then broke out the brushes to make the plating
more blue (as the Tamiya colours that I own and I used in the airbrush aren't particularly strong blue). This is about as far as I got before being called away by the poorly toddler. There is some more work to do to the blue, then some edging and such before I add in the orange bits. The metals will need plenty of work, and there's loads of other bits to do, but it's working OK so far...
Oh, and the rim of the base will more than likely get either a sanding or some plasticard covering, as it is quite distracting at the moment. ;)


